Guitar Expression Pedal: Take Control of Your Sound
The Guitar Expression Pedal is a game-changing tool for guitarists looking to enhance their sound and creativity. It’s not just another pedal on your board; it’s the key to unlocking dynamic control over your effects, allowing you to interact with your sound in ways that feel intuitive and organic.
This device works specifically with guitar pedals, enabling you to manipulate parameters such as delay feedback, modulation depth, reverb mix, or even pitch—all in real time. By doing so, it elevates your playing and creates a more expressive and immersive musical experience.
What Is a Guitar Expression Pedal?
A Guitar Expression Pedal is a foot-operated device that connects directly to your guitar pedals, allowing you to control parameters such as modulation, delay, reverb, or tone. Unlike volume pedals, which only adjust sound intensity, an expression pedal lets you interact with the finer details of your effects, giving you greater creative control.
For instance, you can:
- Gradually adjust delay feedback for a more atmospheric sound.
- Modify modulation depth in real time to create evolving textures.
- Control filter sweeps for unique wah-like effects.
This functionality makes the expression pedal an indispensable addition to any guitarist’s setup.
Why Use a Guitar Expression Pedal?
Here are the key benefits of integrating an expression pedal into your setup:
- Dynamic Control: Modify parameters on the fly to add subtle nuances or bold variations to your sound.
- Versatility: Compatible with a wide range of effects, from reverbs and delays to complex modulations.
- Hands-Free Operation: Adjust your sound without interrupting your playing, maintaining the flow of your performance.
Expression Pedals vs. Volume Pedals: What’s the Difference?
Although both devices are controlled by your foot, their purposes differ:
-
Volume Pedal: Controls only the volume level of your signal.
- Expression Pedal: Adjusts one or more effect parameters (depending on the pedal it’s connected to), allowing for more creative applications.
How to Choose the Best Guitar Expression Pedal
When selecting a Guitar Expression Pedal, consider:
- Compatibility: Ensure it works with your current effects pedals.
- Build Quality: Look for durable materials that can withstand constant use.
- Control Range: Check that it offers a smooth and wide range for precise adjustments.
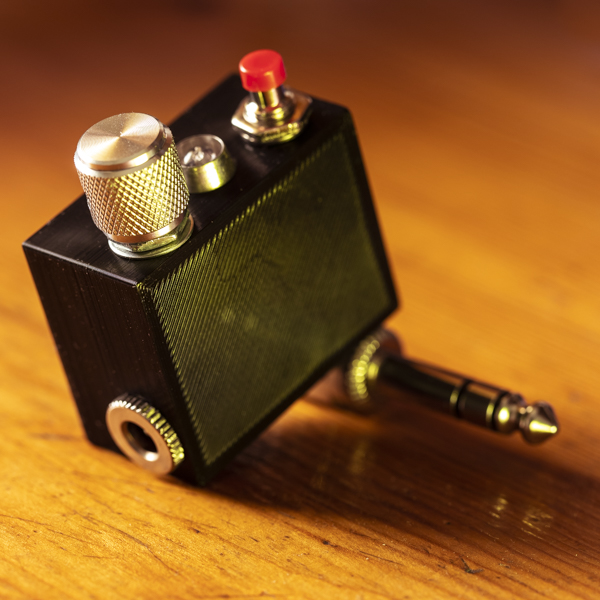
El Garatge: Your Partner in Musical Devices
At El Garatge, I specialize in crafting devices that empower your musical creativity. My products are designed to provide control and versatility, helping you explore new dimensions in your music.
See how some of my products work!
Visit the Devices page to discover my selection of mini expression pedals and other innovative tools designed to enhance your musical journey.
Improve your performance with El Garatge’s mini expression pedals – where quality meets expression.